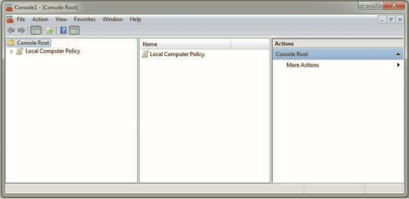
The Windows Local Group Policy (LGP) has fewer options than a domain-based Group Policy, and generally an LGP is used to configure settings for systems that are not part of Active Directory.
In this lab, you explore different options of using the Windows LGP.
Part 1: Create a GPO with Group Policy Editor
- Create a snapshot of your Windows VM. Open the Windows VM.
- Click Start and enter “Run”. Click on the Run application.
- In Run, run the
mmcapplication. Click OK. - If you are prompted by UAC, enter the password or click Yes.
- Click File and Add/Remove Snap-in.
- In the Add or Remove Snap-ins box, click Group Policy Object Editor and click Add.
- In the Select Group Policy Object dialog box, click Browse.
- Click This computer and then OK.
- Click Finish.
- Click OK to display the Console Root screen.

- Administrative Templates are registry-based policy settings that appear in the Local Group Policy Editor. In the left pane under Console Root, click Local Computer Policy.
- Double-click Computer Configuration.
- Double-click Administrative Templates.
- In the left pane, click All Settings. In the middle pane, scroll down through the different LPGs that can be set on the local computer.
- Now change the LGP so that only strong TLS cryptography will be used. In the left pane, double-click Network.
- Click SSL Configuration Settings.
- In the center pane, double-click SSL Cipher Suite Order. This identifies which SSL suites will be supported.
- Click Enabled.
- Note the suites listed in the left pane under SSL Cipher Suites. In a browser, visit the Cipher Suites in TLS/SSL site listed under Help.
- Click TLS Cipher Suites in Windows 10 v1507 for more information on an older Windows version. Locate SSL_CK_RC4_128_WITH_MD5 in the list of available SSL cipher suites.
- Return back to the previous webpage. Click to get more information on the latest Windows version. Note the available cipher suites. This should match those listed in step 19.
- Close the browser.
- In the SSL Cipher Suite Order window, click Apply.
- Click OK.
- In the left pane expand Windows Components. Click Windows Update.
- Double-click on Allow Automatic Updates immediate installation.
- Click Enabled.
- Click Apply and OK.
Part 2: Modify a GPO with PowerShell
The Group Policy Editor reads and sets registry values. Setting the registry settings has the same effect as setting the group policy.
- Run the
regeditapplication. - In Registry Editor, browse to “Computer\HKLM\SOFTWARE\Policies\Microsoft\Cryptography\SSL\00010002”. HKLM is a shortcut for HKEY_LOCAL_MACHINE. Note the Data under Functions.
- Browse to “Computer\HKLM\SOFTWARE\Policies\Microsoft\Windows\WindowsUpdate\AU”. Note the Data under AutoInstallMinorUpdates.
- Double-click AutoInstallMinorUpdates.
- Change the Value data to “0”. Click OK. The local GPO setting could be edited manually here or for automation in PowerShell.
- Click Start and enter “Windows PowerShell”. Click on Run as administrator.
- In PowerShell, use the
Get-ItemPropertycommand for the Registry entry from step 30.Get-ItemProperty -Path HKLM:\SOFTWARE\Policies\Microsoft\Cryptography\SSL\00010002Notice the displayed information.
- Repeat step 35 for the Registry entry from step 31.
Get-ItemProperty -Path HKLM:\SOFTWARE\Policies\Microsoft\Windows\WindowsUpdate\AUNotice the displayed information.
- Use the
Set-ItemPropertycommand to change registry data.Set-ItemProperty -Path HKLM:\SOFTWARE\Policies\Microsoft\Windows\WindowsUpdate\AU -Name AutoInstallMinorUpdates -Value 1 - In Registry Editor, click View from the menu bar, then Refresh. Notice the change in the registry data for AutoInstallMinorUpdates.
Some more steps may have to be taken to have this persist.
- Close all windows.
- Turn off the VM. Revert to the snapshot.
Write up a paragraph answering the following questions.