One of the first things a hacker wants to find out is what computing devices are running on a network. This is the beginning of the process of selecting a target for attack. The term footprinting means determining a network’s layout.
Nmap is a free and open-source network scanner developed by Gordon Lyon and is used for network discovery and security auditing.
In this lab, you will be using Nmap to scan a network for hosts and services.
The purpose of this activity is to provide information regarding how these programs function in order that adequate defenses can be designed and implemented. These programs should never be used in a malicious fashion against another user.
Part 1: Setting up the Windows Host
- Turn on the Windows VM with the host-only network adapter.
- In the Star Menu, search for and click on Windows Security.
- Click on Firewall & network protection. Click on Domain network, then switch Off Microsoft Defender Firewall. When prompted by UAC, click Yes.
- Repeat step 3 for Private network.
- Repeat step 3 for Public network.
- Click Virus & threat protection. Under Virus & threat protection settings, click Manage settings. Switch Off Real-time protection. When prompted by UAC, click Yes.
Part 2: Introduction to Nmap
- Turn on the Kali Linux VM temporarily with the NAT network adapter.
- In Terminal, attempt to install Zenmap.
It will fail to find the package.
sudo apt install zenmap -y
Newer releases of Kali Linux no longer come with Zenmap, the GUI for Nmap.
- View the package sources.
Notice the only active entry.
cat /etc/apt/sources.list - Add a new packages source.
sudo bash -c 'echo "deb http://old.kali.org/kali sana main non-free contrib" >> /etc/apt/sources.list' - Repeat step 9 to view the change.
- Refresh the source cache.
sudo apt update - Repeat step 8 to install Zenmap.
- In the VirtualBox menu bar, click Machine, then Settings.
- Click Network. Change Attached to from NAT to Host-only Adapter. Click OK.
- Back in the Terminal in the Kali Linux VM, use the
nmapcommand to list the available network interfaces and routes.nmap -iflist - Zenmap could give a more complete picture.
sudo zenmapIf prompted for a password, enter it.
- In the Target window, type “192.168.56.1” and click Scan. This scans every open port at target host 192.168.56.1, which is the VirtualBox host adapter. After the Nmap scan is done, notice the entry under Hosts.
One of the advantages that hackers have over information security teams is that they can take all the time they need to prepare for an attack. Unlike the obvious methods of this lab in rapidly scanning all the hosts in a network, the hacker will often “throttle” the probes by sending packets very slowly, thereby taking weeks to footprint the network while avoiding suspicion.
- Repeat step 18 for the Windows VM IP address. Notice the new entry in Hosts and the Windows icon as its OS.
- Click the Services tab. Click through each service.
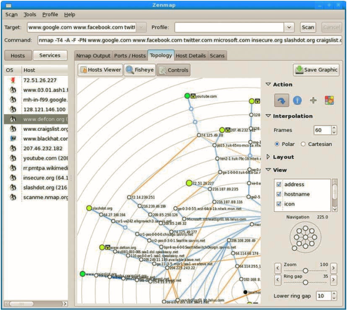
- Click the Topology tab. As more hosts are scanned, this map will grow.
- Click the Host Details tab, click through each of the host machines in turn and examine the type of machine and the MAC addresses associated with each machine.
Please write up a paragraph answering the following questions:
- Was Nmap able to identify the OS of the Windows VM? How?
- What information is being provided by Nmap?
- How would this be useful to an attacker?
- What are the benefits of using the Zenmap GUI? What about for using the Nmap command line package?