Coder Code Server is an open-source self-hosted web-based version of Visual Studio Code. It allows you to run VS Code on any machine with a web browser and access it from anywhere.
Visual Studio Code is a popular open-source code editor that is available for Windows, macOS, and Linux. However, it is not available for Chrome OS or tablets. Code Server is a great tool for developers who want to work on their projects from anywhere through a web browser without having to install VS Code on every machine they use.
In this lab, you will learn how to install and configure Code Server on a Docker host.
GitHub Codespaces is a similar tool that allows you to run VS Code in the cloud. It is free for students, educators, and open-source developers. However, it requires a GitHub account.
Part 1: Run the Code Server Container
- In the terminal, create a volume to store the configuration files for Code Server.
This volume will be mounted as a volume in the Code Server container.
It will be used to store persistent data such as extensions and workspace files.
docker volume create coder
You can alternatively use a host volume to store the configuration files on the host machine.
However, using a virtual volume is recommended because it allows you to easily migrate the Code Server container to another Docker host without having to copy the configuration files.
After creating the container, you can move files to the container with the docker cp command.
For example, to copy a file named file.txt to the /config/workspace/ directory in the container, you can use docker cp file.txt coder:/config/workspace/file.txt.
- Create a container based on the official Watchtower image from the Docker Hub.
 docker run --detach `# run in background` \
     --name coder `# name the container` \
     --env PUID=1000 `# set the user id` \
     --env PGID=1000 `# set the group id` \
     --env TZ=America/New_York `# set the timezone, this can be set to your location` \
     --env PASSWORD="<password>" `# set the password, replace <password> with your own password` \
     --publish 443:8443 `# publish port 443, this can be changed to any available port` \
     --volume coder:/config `# mount the coder virtual volume to /config in the container` \
     --restart unless-stopped `# restart unless stopped manually` \
     lscr.io/linuxserver/code-server:latest `# image name`
Coder owns the Code Server project and publishes its own Docker images to the Docker Hub which you can alternatively use to run Code Server. However, images offered by Linuxserver tend to be more stable and consistent across different projects.
The --env PASSWORD="<password>" flag saves the password in cleartext in the container.
This is not recommended for production environments.
You can instead use the --env HASHED_PASSWORD="<hashed-password>" flag to set the password to a hashed password.
Also, it is recommended to use a vault such as HashiCorp Vault to store the password.
By default, Code Server runs as the root user.
However, it is recommended to run Code Server as a non-root user for security reasons.
The PUID and PGID environment variables are used to set the user and group ID of the user that will be used to run Code Server.
The TZ environment variable is used to set the timezone of the container.
You can find a list of valid timezones here.
The port that Code Server listens on can be changed by changing the first number in the --publish flag.
For example, to listen on port 8080, you can use --publish 8080:8443.
The default workspace directory is /config/workspace.
You can change this by setting the DEFAULT_WORKSPACE environment variable.
Part 2: Enable SSL on the Code Server Web Interface
- Enable SSL.
Enabling SSL is optional but highly recommended. If you do not enable SSL, your password will be sent in cleartext over the network. This is a major security risk and should be avoided at all costs.
You can use Let’s Encrypt to generate free SSL certificates.
- Wait a few seconds for the server to generate its configuration files.
Then enable SSL with your own SSL certificates.
 sleep 10 # sleeps for 10 seconds

 docker exec -it coder bash -c "sed -i.bak -e 's/cert: false/cert: true/' \
     -e 's/bind-addr: 127.0.0.1:8080/bind-addr: 0.0.0.0:443/' \
     ~/.config/code-server/config.yaml `# allows code-server to listen on port 443` \
     && mv ~/.local/share/code-server/localhost.crt ~/.local/share/code-server/localhost.crt.bak \
     && mv ~/.local/share/code-server/localhost.key ~/.local/share/code-server/localhost.key.bak" `# backs up the default SSL certificates`

 # copies the SSL certificates from your host to the container
 docker cp /etc/ssl/certs/<certificate>.crt coder:/config/.local/share/code-server/localhost.crt \
     && docker cp /etc/ssl/private/<certificate>.key coder:/config/.local/share/code-server/localhost.key
Replace <certificate> with the name of your SSL certificate.
- Restart the Docker container.
docker restart coder
Part 3: Verify the Code Server Container
- Verify that the Code Server container is running.
This command will show all running containers and filter the output to only show containers with the name “coder”.
docker ps --filter name=coder - Find the IP address of your Docker host.
This command will show the IP address of a Linux machine.
hostname -I | awk '{print $1}'
This command will only work if you are running Docker on Linux.
However, if you are running Docker on macOS, you can use ipconfig getifaddr $(route get 8.8.8.8 | awk '/interface: / {print $2; }') to find the IP address of your Docker host.
If you are running Docker on Windows, you can instead use ipconfig | findstr /R /C:"IPv4 Address".
Part 4: Access the Code Server Web Interface
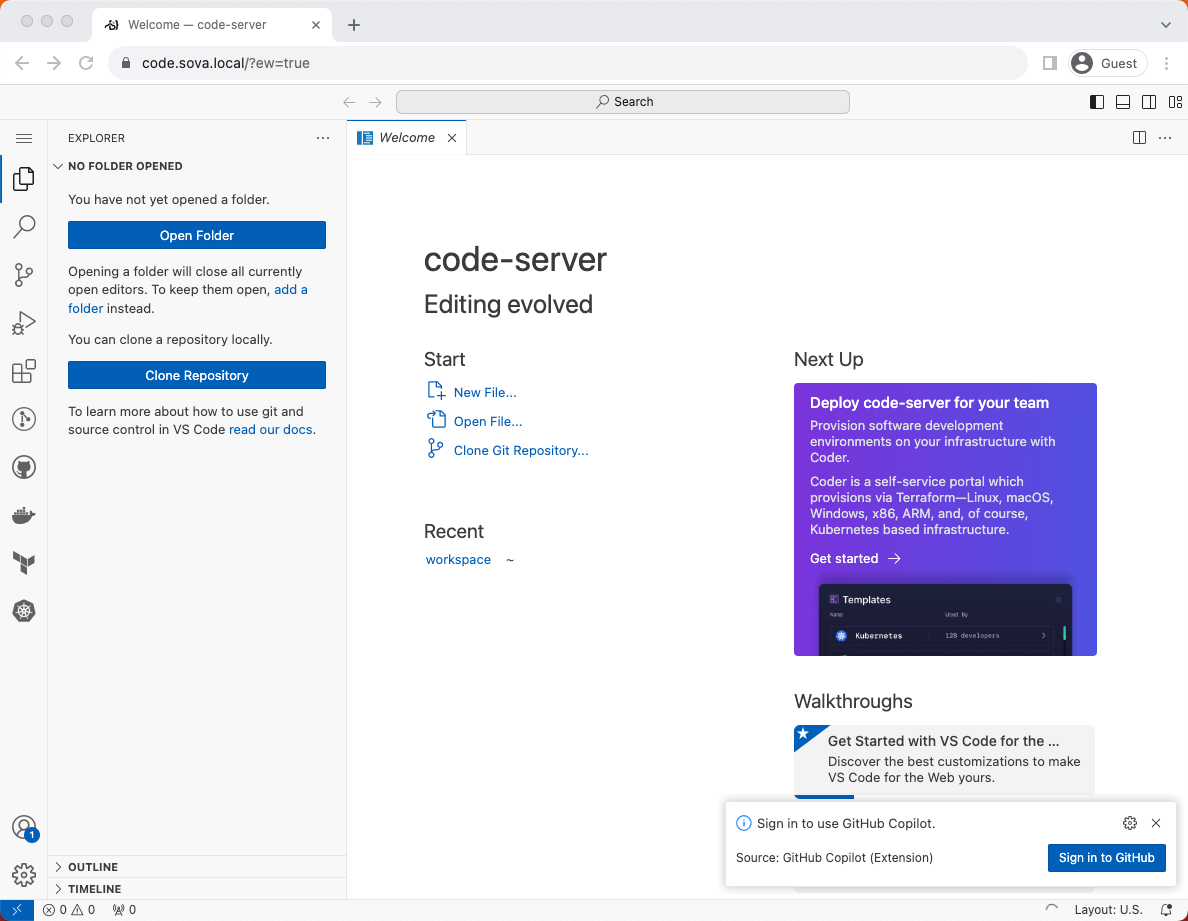
- Open a web browser and navigate to the IP address of your Docker host on port 443, or
https://<docker-host-ip>. You should see the Code Server web interface.
If you are using a self-signed certificate, you will need to trust the certificate in your browser.
- To login, enter the password you set in step 2 in the Password field and click Submit.
- When prompted to trust the authors, click Yes, I trust the authors.
Part 5: Configure Git
- Press Ctrl + ~ to open a terminal in the Code Server web interface.
- Follow the instructions in the Git lab to configure Git.
Part 6: Install Extensions
Some extensions are not compatible with Code Server.
- Press Cmd + Shift + x to open the Extensions tab.
- Search for the extensions you want to install. Click on the Install button for each one.
Some recommended extensions include GitHub Pull Requests and Issues for GitHub integration, GitLens for insights into code ownership, Docker for Dockerfile syntax highlighting, AWS Toolkit for AWS integration, and Python for Python debugging tools.
- Configure the extensions as needed.
Some extensions may require you to restart the container before they can be used.
Part 6: Install GitHub Copilot
GitHub Copilot is an AI pair programmer that helps you write code faster and with less effort. It is currently free to use for students, educators, and open-source developers.
- Repeat step 10 to open a terminal in the Code Server web interface.
- Download the latest version of the GitHub Copilot VS Code extension.
curl -sL https://github.gallery.vsassets.io/_apis/public/gallery/publisher/github/extension/copilot/latest/assetbyname/Microsoft.VisualStudio.Services.VSIXPackage -o copilot.vsix - Install the Copilot VS Code extension.
code-server --install-extension copilot.vsix - Clean up the downloaded VSIX file.
rm ./copilot.vsix - Login to GitHub in the Code Server web interface to activate the GitHub Copilot service.
Part 7: Open a Project
- Clone a project from GitHub or open an existing project.
git clone git@github.com:sindresorhus/awesome.git - Click on the hamburger menu in the top left corner. Click File and then Open Folder.
- Navigate to the /config/workspace/awesome/ directory and click OK.
- You can now edit the project files in the Code Server web interface.